Tag Archives: drawing

Don’t call it a comeback

Oh man. I know it’s been a while and it probably seems like I’ve been slacking off, but I promise I haven’t been.

Since my last post I have 3 pairs of completed socks. Two pairs are for myself and one pair was for the husband. I currently have another pair in the works for myself.

Latest pair for the husband using Lion Brand Sock-Ease in Taffy.

Latest pair for the husband using Lion Brand Sock-Ease in Taffy.

Socks for me.

Socks for me.

Shorty socks for me using a fish lips kiss heel.

Shorty socks for me using a fish lips kiss heel.

Shorty socks in progress using Vanna's Glamour yarn with a fish lips kiss heel.

Shorty socks in progress using Vanna’s Glamour yarn with a fish lips kiss heel.

The last two photos are socks that I used a fish lips kiss heel pattern. I really like the heel a lot. It was a little intimidating at first but once you get the hang of it, it’s so much easier and tidier looking than having a heel flap and picking up stitches for a gusset. I don’t think I’ll ever use a different heel again. Best of all the fish lips kiss heel can be used for toe-up and cuff-down socks.

You can get instructions for the Fish Lips Kiss Heel by clicking HERE. The heel is by Sox Therapist on Ravelry and the pattern is only $1.00. The instructions are very clear and there is also a photo guide. I highly recommend this pattern. Again, it’s only a dollar and it’s worth every penny and more!

I have a few more finished projects. One of them being this washcloth set that I was working on every once in a while.

Washcloth set finally finished using Cotton(ish) yarn by Vickie Howell for Bernat.

Washcloth set finally finished using Cotton(ish) yarn by Vickie Howell for Bernat.

I don’t remember what the pattern is called… I do know I found it in the Lion Brand Free Pattern app I have on my iPhone. It’s a really simple 4 row repeat and it ends up with a nice texture.

I also made a few headbands to try and use up my various scrap yarn.

Headbands to use up various scrap yarn.

Headbands in all different sizes.

A couple of these are a traditional 4×4 ribbing and the others are a broken 4×4 ribbing. I didn’t follow a pattern because I made it up as I went. However I did write it down, so I’d like to share it with you. Here goes:

For an adult size headband:

You will need: U.S. Size 8 Straight Knitting Needles, U.S. Size 7 Straight Knitting Needles, Worsted Weight Yarn, Darning Needle

With size 8 needles cast on 88 stitches.

Work K4,P4 ribbing for 22 rows.

(This is for a traditional ribbing. To use the broken ribbing you will work a row of K4,P4 across, then a row of K. Work in this pattern for 22 rows.)

Bind off in pattern.

With size 7 needles cast on 14 stitches.

Work in stockinette stitch for 22 rows and bind off.

Stitch headband together at short ends and gather seam. Wrap small stockinette piece around gathered seam and stitch together. Weave in ends.

Another variation of this pattern is to cast on 92 sts and work 2×2 ribbing with the rest of the instructions being the same. You’d end up with a headband like this:

Ribbed headband in Ivory Red Heart Shimmer,

Ribbed headband in Ivory Red Heart Shimmer.

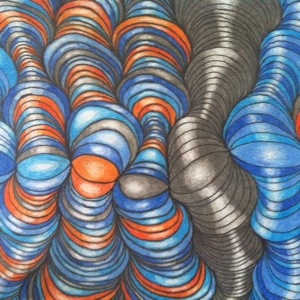
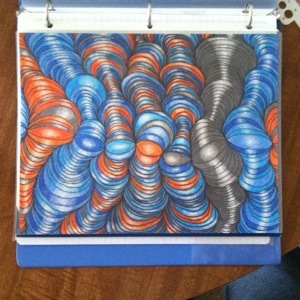
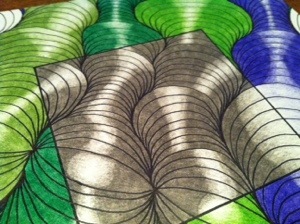
In Pinterest Day News: Sadly, I still haven’t gotten frames for my artwork. But I do have a couple photos of the finished drawings for you to see. I really like how they turned out and I am tempted to draw a few more.

Pinterest Day Drawing One.

Pinterest Day Drawing One.

Pinterest Drawing Two.

Pinterest Drawing Two.

So that’s my quick update for you. Until we meet again…


Pinterest Day 2: Part 1 – Colored Pencil Fun

It’s that time again, folks. Well… Sort of.

I found a pin in my never ending crafty board that I decided I was going to give the good old college try. This one isn’t yarn related, but I thought it looked pretty awesome and fun.

I have been wanting to add some more art to my work space and I figured, “Why not make my own?”. So, I scoured my pinterest board and found this pin. It’s basically an exercise to practice shading and pressure control. It’s cool to see how it develops as you go along, but it does take some time to complete.

Since it has been taking me a while to finish my drawings, I thought I would make this a two part post to show you the progress I’ve made and also give you some time to work along with me if you wanted to. And why wouldn’t you? I’m awesome and this exercise is awesome.

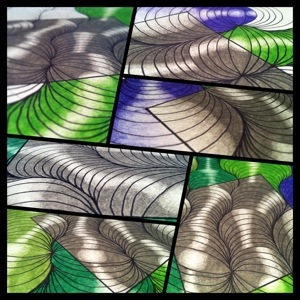
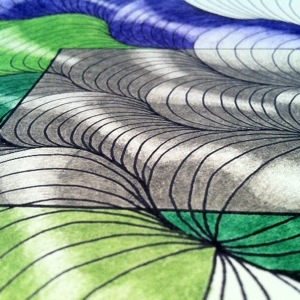
I’ve finished one drawing so far and my second drawing is almost complete. Here are some progress photos:

Drawing one

Drawing one

20140321-181002.jpg20140321-180934.jpg

Second drawing

Drawing two

20140321-181024.jpg20140321-181040.jpg

My husband had the idea to add a “row” of grey to give it a little extra interest. I liked how it turned out in the first drawing so that is what inspired me to add the “window” of grey in the second drawing. Once I’m finished I’ll be looking for some frames to put them in and I’ll hang them on the wall in my work area. I’m pretty stoked.

There will be another update to this Pinterest Day post so I can show you the final pieces and hopefully some shots of them hanging on my wall.

In knitting news, I am making progress on my fourth pair of socks. I’m almost done with them and I am excited to start another pair. There are a lot of photos of them that I have posted to my Instagram.

I hope to have the socks done for my next post and perhaps a couple other FOs for you to look at. Until next time.