Authors, Socks, and Badgers.

Just kidding. No badgers.

I would like to introduce you to my dear friend, Allison M. Dickson. She’s pretty much the bee’s knees of horror fiction. Take a look at her web site.

She’s written many a short story, has works in some different collections, and has two novels, Strings and Colt Coltrane and the Lotus Killer, available right now. You can find them all on Amazon.

She is also a co-host on the podcast Creative Commoners. She and the other co-hosts, Corey Bishop and Chris Armstrong, discuss the challenges of being creative. They also talk about games, super heroes, writing, movies, and just generally being awesome. Creative Commoners sometimes features a fellow guest host of the creative community and things can get even more awesome, if you can wrap your head around that. (Which you can, I know it. I have faith in you.)

Speaking of guests and fellow creative persons. Allison has been featuring an interview series on her web site called “5 Quintessential Questions” where she poses 5 questions to an independent artist. This person can be an author, musician, painter, sculptor, chef, comic book inker, birdhouse maker, underwater basket weaver… Whomever is creative, passionate, and a level 50 karate-ninja-robot-assassin. (Okay, maybe not that last thing, but you get the idea.)

I was lucky enough to earn an interview with her. I had a lot of fun answering the questions and quite frankly, I’m still flattered that she included me in this awesome series. You can read the interview here.

I encourage, nay, I insist you use the links I’ve provided above to get to know more about Allison, her great stories, and the podcast Creative Commoners. You will not be disappointed.

Okay, I know that I lied to you about the badger thing, and for that I’m a small amount of sorry. However, I came clean about it straight away and that has to count for something, right? What I didn’t lie to you about is socks. That I do have some content about and here it is in all it’s glory. (ha. glory.)

So, I’d consider myself an accomplished and experienced crocheter. I’ve made blankets, slippers, sweaters, scarves, potholders, hats, batman masks, plush dolls, purses… You name it, I’ve hooked it up. I’ve written patterns, I read patterns, I read charts, I make things without patterns. I do it all. Oh yes.

But when it comes to knitting, I’ve always felt like a n00b. I mean, I’ve made things like washcloths, hats, headbands, scarfs… I’ve made a queen size afghan (still needing finishing touches, of course) and a sweater. A freaking SWEATER. Which was not an easy task. I had to learn all the different joining techniques because sewing pieces together doesn’t use the same style of stitching for different seam placements. Sigh.

I’ve always wanted to knit up some socks, but using DPNs has been so awkward for me. I felt like I was trying to knit with a spider that constantly wanted to poke my eyes out.

I finally sat down and said, “Self, you are going to knit a sock if it is the last damn thing you ever do.” So I got out the DPNs, some scrap sock yarn, a free pattern I picked up at Joann’s, and I made a blasted sock. It was awkward and it’s full of little mistakes, but it’s a sock and I made it.

Behold! My first sock.

One lonely sock.

One lonely sock.

Since that one turned out decently I decided I was going to get comfortable using DPNs. I got out a different pattern, some other sock yarn that I got on clearance, and I cast on another sock so I can make a pair for my husband. Since I am using clearance yarn that I didn’t have enough of one color to make a whole pair, these socks are going to look like Joseph’s technicolor dreamcoat, but that’s okay. This pair of socks are a learning exercise for me. Besides, my husband says he will wear them with pride.

I’m almost done with the first sock after 4 days. This pattern is a spiral of 4×4 ribbing until you get to the toe, and then it’s just done in stockinette stitch. There is no heel on this pattern, which I am thankful for. It gets me used to working in the round and it will also help with making sure it fits his giant, size 13 feet.

Here are some pictures of the sock in progress. Look at them. Love them.

Free Spiral Sock Pattern by Patons

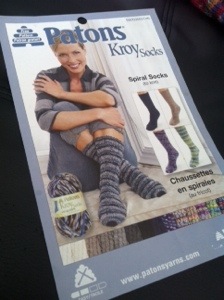
Free Spiral Sock Pattern by Patons (click the pic to get the pattern)

20140221-141121.jpg

Work 4×4 ribbing in 5 row repeat until your fingers bleed.

20140221-141131.jpg

The colors are hideous but the love… The love is there.

The progress so far. Only about 36 rounds to go.

The progress so far. Only about 36 rounds to go.

I know it really isn’t anything special but making these socks means a lot to me. I’ll finally be a real knitter!

I feel bad about the badger thing. So here is a link to the badger page on Wikipedia. BADGERS!


Pinterest Day: Granny Squares

Here is the long-awaited and much-anticipated Pinterest Day post. You have probably deduced from the title that we are covering some Granny Squares for this introductory post. Good job, Sherlock Holmes.

I created a board on Pinterest for Granny Squares for the exchange group that I joined a few weeks ago. I wanted to make some different style squares to challenge my abilities and learn some new techniques.

We will cover 5 different squares from my pin board: A Celtic Knot, an owl, a holiday wreath, an open-work square, and 4 hearts in a square.

The Celtic Knot:

Celtic Knot Square

Celtic Knot Square

The pin leads eventually to the free pattern on Ravelry by Carola Wijma. This square looked a little intimidating at first, but as I read through the directions it actually turned out really easy to make and I was very pleased with the results. I also liked that I could make two different 6″ squares with it just by changing where the corners of the square are placed. I ended up making this square about twelve times for the exchange because it was so fun and easy and I just love the way it turns out. I definitely recommend making this square.

The Owl:

Owl Square

Owl Square

This pin lead to the free pattern on Repeat Crafter Me by Sarah. The directions are pretty clear but I found that I did have to tweak it a little to make sure that the owl was centered correctly. Overall, I was happy with how it turned out and felt as though the pattern was mostly easy to follow. I would recommend making this square but I don’t know if I would make a blanket with these though due to the button eyes.

The Holiday Wreath:

Holiday Wreath Square

Holiday Wreath Square

This pin leads to the free pattern on KaleiDesigns by Melanie Stiles. I used Red Heart Super Saver with a size G hook to get a 6″ square instead of the recommended size that will give a a 7″ square. Even though this is a holiday pattern, you can use any colors you’d like and it still turns out great and doesn’t necessarily scream Christmas.  I’d recommend this square to use for most anything, be it a blanket, a scarf, a pillow, whatever you like. It’s a quick, fun, and easy square to make and it isn’t so mindless that it bores you.

The Open-Work Square:

Open-Work Square

Open-Work Square

This pin didn’t really have a link, so I just used the picture of the chart to make it. If you want to make this square you will have to know how to use charts instead of written instructions. I recall having to tweak the pattern a bit but not because it is incorrect, I’m just picky as to where I like to place a ch3 as a dc. I liked how the square turned out but it wasn’t my favorite. It seems a little flimsy to make a blanket out of these squares but it might make a nice accent to a blanket or a pretty scarf or shawl square.

4 Hearts in a Square:

4-Hearts Square

4-Hearts Square

This pin leads to the free pattern on HooksandYarns. I’m having a hard time figuring out the author of the pattern, but I believe it is by Debi Y. I thought that this pattern was cute and since I found it around Valentine’s Day I thought I would give it a shot. The instructions and picture tutorial are very clear and easy to follow. But, being the pain in the ass that I am, I didn’t follow them to the letter. I hate weaving in ends and I hate sewing things down if I feel like I don’t really need to, so I changed the pattern a bit to suit my “style” (style = laziness). Basically, I crocheted the heart tops as one round, working slip stitches in each chain of the corners. Then I changed colors and worked the 4th round as directed, but then with round 5 I tacked down the heart tops by the back loops as I made some of the stitches in the round. It seems complicated, what I did… But it isn’t. I just haven’t figured out a way to explain it very well. Anyway, I do recommend this square. It turned out really nice, and if you looked at the link, you can switch up the pattern to make ice cream cones, cupcakes, or even a 4 leaf clover. Super cute.

I was going to add one more square to this list but as I clicked through the links it eventually lead me to a book. And the book isn’t free so I think the person who posted the pattern just copied out of the book and I am not comfortable linking to it. In fact, I may take it off my Pinterest Board.

So there it is. Pinterest Day. Victory.


Granny Squares, I Made Some.

Hello dearest readers. As you know I joined a granny square exchange group. It’s quite exciting… If you’re into that sort of thing. And I totally am.

I have been scouring Pinterest for different squares so I can learn some new techniques. Some of the links lead to just pictures and no pattern or to a pattern that costs a ridiculous amount of money that I refuse to pay for. I mean, one pattern had you pay for EACH ‘step’ of the square so the damn thing ends up costing you like $20.00 and I’m just not going to do that. If I pay you $20.00 you better come to my home and make the square while serenading me. Seriously.

Anyhaps, I decided to do a few free-form squares for fun and games. I ended up with one I really liked and I actually took the time to write it down. So here is the first crochet pattern I have ever written. I hope you like it, and further, I hope it makes sense. If you find mistakes or I have confused you to the point that you want to hunt dolphins, please message me and I will be happy to make corrections or join you for an epic dolphin punching-event.

Materials:

US Size G hook, Worsted Weight Yarn (I used Red Heart Super Saver for this pattern)

Gauge:

This square should measure 6″x6″ when finished.

Abbreviations:

  • ch: chain
  • sl st: slip stitch
  • st: stitch
  • sp: space
  • sc: single crochet
  • hdc: half double crochet
  • dc: double crochet
  • sk: skip

Special Notes:

A ch3 at the beginning of a round will count as your first dc unless otherwise indicated.

Now – On to the pattern:

Ch5, sl st in first ch to form a ring

Round 1:

Ch3, 2 dc, *(ch3, 3 dc)  3 times*, ch3, join with sl st in top of beginning ch3.

(12dc and 4 ch3 sp)

Round 2:

Sl st in next dc, (ch3, 2 dc, ch3, 3 dc) in same dc, ch1, *[skp ch3 sp and first dc, (3 dc, ch3, 3 dc, ch1) in next dc], repeat from * around, join with sl st in top of beginning ch3.

(24 dc, 4 ch3 sp, 4 ch1 sp)

Round 3:

Sl st to ch3 sp, (ch3, 2 dc) in ch3 sp, ch1, sk next 3 dc, *[(3 dc. ch3, 3dc) in next ch1 sp), ch1**, skp next 3 dc, 3 dc in next ch3 sp, ch1], repeat from * around, ending at ** , join with sl st in top of beginning ch3.

(36 dc, 4 ch3 sp, 8 ch1 sp)

Round 4:

Sl st in next dc, (ch3, 2 dc, ch3, 3 dc) in same dc, ch1, 3 dc in next ch1 sp, ch1, 3 dc in next ch3 sp, ch1, 3 dc in next ch1 sp, ch1, *[sk 1 dc, (3 dc, ch3, 3 dc) in next dc, ch1, 3 dc in next ch1 sp, ch1, 3 dc in next ch3 sp, ch1, 3 dc in next ch1 sp, ch1], repeat from * around, join with sl st in top of beginning ch3.

(60 dc, 4 ch3 sp, 16 ch1 sp)

Round 5:

Ch3, dc in next 2 dc, (2 dc, ch2, 2 dc) in next ch3 sp, *[dc in next 3 dc, ch1, dc in next 3 dc, ch1, hdc in next 3 dc, ch1, dc in next 3 dc, ch1**, dc in next 3 dc, (2 dc, ch2, 2 dc) in next ch3 sp], repeat from * around, ending at **, join with sl st in top of beginning ch3.

(76 dc, 4 ch2 sp, 16 ch1 sp)

Round 6:

Ch1, sc in same sc, sc in each st and ch1 sp around, working (2 sc, ch2, 2 sc) in each corner ch3 sp.

(108 sc and 4 ch2 sp)

After weaving in your ends you should end up with a solid granny square much like the one on the right in this photo:

Rosemary's First Granny Square

Rosemary’s First Granny Square

If you choose to make this square using multiples colors, I recommend beginning each new color in a corner space. If you would like some help making this square with color changes, please let me know. I will be happy to give you tips or I can even re-write the pattern to include the changes.

In other news, I am still rounding up links and photos for the Pinterest day post. I want to be able to give everyone proper credit and give you the links to the patterns if you want to try them out.


Cats and yarn living together.

I went ahead and did the silliest thing a yarn crafter can do.

I adopted a kitty cat.

20140203-143443.jpg
This is Miss Kissa

Needless to say, I haven’t accomplished a whole lot since my last post.

I’m currently working on the last panel of my giant knit afghan. I’m ahead on my granny square exchange timeline.

I am happy to say that I’ll be starting my Pinterest day post soon. I’ve rounded up a few granny square patterns that I liked and tried out. A few have worked out well, one of them not so much.

Until then, please enjoy some random photos of my cat and some granny squares.

20140203-144342.jpg

20140203-144353.jpg

20140203-144404.jpg

20140203-144413.jpg

20140203-144440.jpg


A virtual cornucopia of yarny things.

I’ve been trying to get back to my UFO stash.
I decided to break out the afghan that ate Tokyo. I’ve made some progress on it, finishing panel 7 of 9 and starting panel 8.

20140121-202038.jpg
Work 4×2 ribbing for the rest of your life.

The pattern is simple enough. So is stitching the panels together. But the ends to weave in. The ENDS!! Make it stop.

And as if I don’t have enough to do, I went ahead and joined a Granny Square Swap Group. I’ve already made some squares.
I thought it would be a fun way to use up scrap yarn and try out new stitches and techniques and what have you.

20140121-202639.jpg
It’s more likely that deep down I’m a masochist and I need to seek some sort of treatment.

In other news, I’m trying to think of some fresh ideas for posts, as I think constantly publicly flogging myself for all my unfinished work will probably get tiresome.
I believe I’m going to start a Pinterest day (how frequently, I’m not sure yet). This will consist of choosing a pin from my mile long crafty Pinterest board and seeing if it’s worth while to have pinned at all. From there we can either ooh and ahh over it or laugh at how miserably it has failed. I look forward to starting this tradition and really exercising my sense of sarcasm when things go terribly, terribly wrong.

Until next time.


About that purgatory thing…

I haven’t been very good at working on my current unfinished projects the last few days.

I managed to weave in ends on this set of washcloths.

20140116-233422.jpg

I was also able get a lot more done on my current scarf. I ran out of yarn for it. So into purgatory it goes. Not helpful in busting the stash of unfinished business. Sigh.

I did, however, use up lots of scrap yarn making these headbands:

20140116-233817.jpg
Please don’t judge me by my Christmas tablecloth in January.

Now I’m working on some more washcloths because I need more of them in my life.

Also, I crocheted this baby beanie. The ends aren’t woven in because… I have issues.

20140116-234327.jpg

That’s all for now. #startallthethings #finishnone


Making a dent in my WIPs

Yesterday I talked about getting my “Project Purgatory” under control. Using the guidelines I made for myself, I was able to make a bit of progress in my goal.

Between yesterday and today (and a couple pots of coffee), so far I have accomplished the following:

  • Frogged one pillow – It wasn’t the correct size for a pillow form.
  • Frogged the facehugger – I just wasn’t happy with the way it was turning out. I need to think this one over a bit more.
  • Weaved in ends on the two fair isle hats – Finished.
  • Weaved in the ends on one washcloth – Finished.
  • Weaved in the ends on the zombie hat – Still needs the finishing touches with needle felting.
  • Weaved in ends on a handbag – Still needs lining and handles.
  • Completed crocheting a potholder, including weaving in the ends.
  • Completed 80 rows on the latest “My Garter Slipped” knitted scarf, by Bereni, from my first post.
  • Started making a list of materials I need to complete some other projects.
DSCN0966

Progress! I’m so proud of myself!

Since the weather here is cold and dreary, I plan on working on the purgatory tote bag quite bit more this evening. I’ve found that a fresh pot of coffee and kind of bouncing back and forth between projects helps me get more done than if I were to try to just concentrate on one specific thing. It also helps me in not starting yet ANOTHER project.

So I am going to pour myself another mug of joe and get back to it. I hope that you are making progress on your WIPs and UFOs. I hope you’re making progress on any and all of your goals!


WIPs and UFOs

I have a very large tote bag that I keep my unfinished projects in. I lovingly refer to it as “Project Purgatory”.

I like to put things in the tote bag that are mostly finished. Things that need ends woven in or things that I need to get a couple materials for to finish them up. My intentions are good. Really, they are.

I recently went through this bag of nonsense and I have found that I have a lot of finishing to do:

  • Zombie Hat: Needs embellishments and ends woven in.
  • Baby Sweater: Needs another skein of yarn.
  • 2 Throw Pillows: Need pillow forms.
  • 3 Handbags: Need handles and linings.
  • 5 Washcloths: Need ends woven in.
  • 2 Fair Isle Hats: Need ends woven in.
  • Change Purse: Needs clasp.
  • Felted Tote: Needs handles.
  • 2 Small Afghans: 1 needs ends woven in, 1 needs finished or frogged entirely.
  • Large Plush Face Hugger (From Aliens): Needs finished or frogged entirely.
  • 4 Miniature Plush Figures: Need embellishments.

Then there are the things I am currently working on. Like the scarf from my last post, a crocheted potholder/trivet, a knitted queen size afghan.

It’s so difficult to get motivated to finish these things sometimes. When I look at the pile of projects it seems so overwhelming. Even just weaving in ends seems like it’s too much just because I know how boring and tedious it can be.

I am making it a goal to get all of these projects taken care of as soon as possible. What I am going to try is this:

  1. I will choose an unfinished project out of my stash.
  2. I will assess what needs to be done to complete it.
  3. If I need materials and I have time to get them, I will make a trip to the craft store.
  4. If I am unable to get the materials for the project, I will simply choose a different project to work on.
  5. Once I have chosen a project and have the materials needed to finish it, I will set a timer to work on the project for at least 90 minutes.
  6. I will work on the project for the given time until it is finished or the timer goes off.
  7. If the project isn’t done when the timer goes off, I will pick up where I left off the next day for the same amount of time.

I am going to try to hold true to this to get these projects finished. And I will try to post the finished results here when they are complete.

How do you motivate yourself to finish projects? Do you find it easier or more difficult to finish projects when they are for someone else?
How many UFOs and WIPs are too many for you?

Share some of your “Project Purgatory” busting secrets with us!


Welcome to Crocheting Tiger, Knitting Dragon!

I’ve got to be honest here…

I’m not really sure what this blog is going to shape into. I have a lot of ideas for it. I want to use it to show you what I’m working on for the shop. I want to show you new techniques in knitting and crocheting. I want to show you behind the scenes looks at my work space and my materials.

I want to share what inspires me. And I want to inspire you.

That’s what makes this first post so very difficult. What do I share with you first?

Let’s talk about what I am currently working on.

"My Garter Slipped" Scarf, pattern by Bereni.

“My Garter Slipped” Scarf, pattern by Bereni.

This pattern is called “My Garter Slipped Scarf” by Bereni. The free pattern can be found on Ravelry here, or on her blog here.

I have made this scarf twice already. The first time I used a bulky weight yarn with US size 13 knitting needles. The second time I used US size 9 needles and I worked it using a worsted weight shimmer yarn along with an ombre sock weight yarn.

The one I am knitting up now is on US size 9 needles using another worsted weight yarn. The yarn is Deborah Norville Everyday Soft Worsted in colorway Antique Lavender.

When I found this pattern it interested me right away for quite a few reasons.

  • It’s worked flat.
  • I love the texture and how it looks and feels layered, with stitches on top of stitches.
  • It’s so easy!
  • It’s so customizable.

I love a pattern that I can manipulate by using different weight yarns and different sized needles. I’m also a fan of being able to adjust the length or width of the scarf and being able to add my own embellishments. I was able to add fringe to one version I made and it turned out really lovely.

garterSlippedFringe

Using a combination of worsted and sock weight yarns.

Do you have any favorite patterns that you like to customize? Please share them here. Be sure to let us know where you found them!

That’s all I’ve got for today. Thanks for stopping by!